Voor zowel ondernemers die veel met beeldmateriaal werken om een boodschap over te laten komen of om een product te verkopen, als voor liefhebbers van beeldmateriaal is het belangrijk dat hun foto’s, hun beeldmateriaal, zo goed mogelijk wordt weergegeven op de beschikbare (sociale) informatie kanalen. Hoe irritant is het om foto’s op Facebook te zetten en dan te merken dat het net niet zo scherp is als jij voor ogen had, of in elk geval zoals het op jouw beeldscherm wordt weergegeven. Door het beeld zelf aan te passen en te comprimeren heb je de kwaliteit ervan in eigen hand.
Omdat Facebook het formaat en de indeling van je foto’s automatisch aanpast (extremer gecomprimeerd) wanneer je ze toevoegt aan Facebook, raden ze zelf (op hun help pagina) voor de hoogst mogelijke kwaliteit het volgende aan:
1. Pas het formaat van je foto aan naar een van de volgende ondersteunde groottes:
- Gewone/post foto’s: 720px, 960px, 2048px (langste zijde)
Als je een foto van 2048px gebruikt, schakel dan het vakje Hoge kwaliteit in bij het uploaden in FB. Als je een foto upload naar een Facebook-album is dat prima, want er is een vakje voor “hoge kwaliteit”. Dit helpt over-compressie te voorkomen. Echter, bij het direct uploaden van foto’s op de tijdlijn of als omslag is er geen selectievakje. Online wordt ook aangeraden om de kwaliteit dan op 70% te zetten in Photoshop of Lightroom bv (in Lightroom bij Exporteren > Uitvoer verscherpen: zet ik Scherm op Standaard).
- Omslagfoto’s: 851px bij 315px
Om te voorkomen dat je omslagfoto wordt gecomprimeerd, zorg ervoor dat de bestandsgrootte onder de 100 KB blijft. Door zelf al je afbeelding zo klein mogelijk te maken hoeft Facebook dat niet te doen en wordt de kwaliteit veel minder aangetast.
2. Sla je afbeelding op als een JPEG-bestand met een sRGB-kleurprofiel.
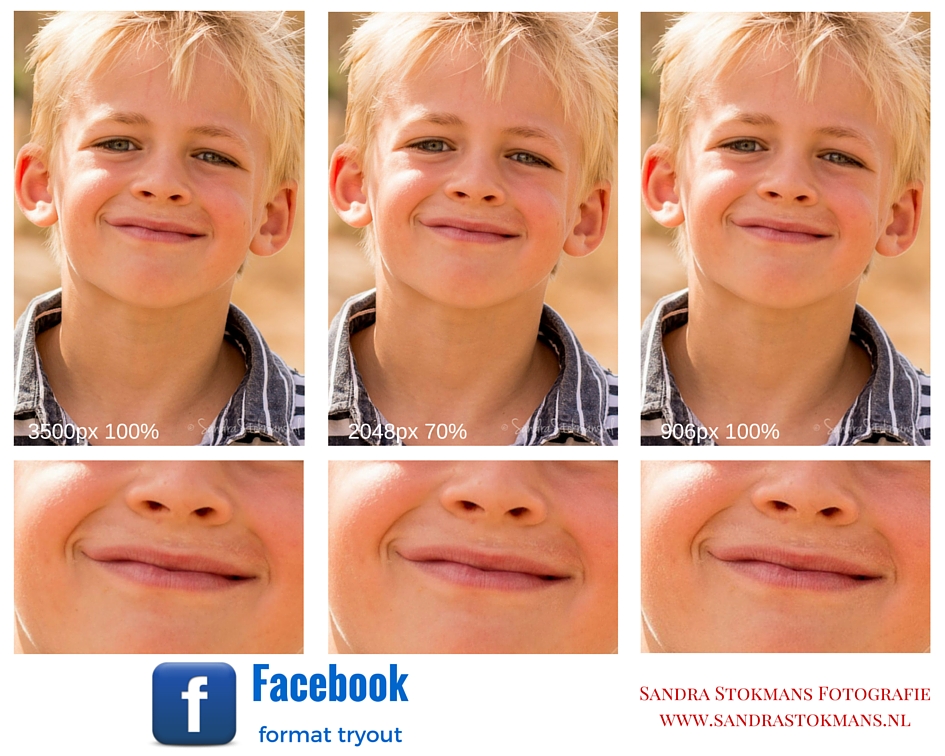
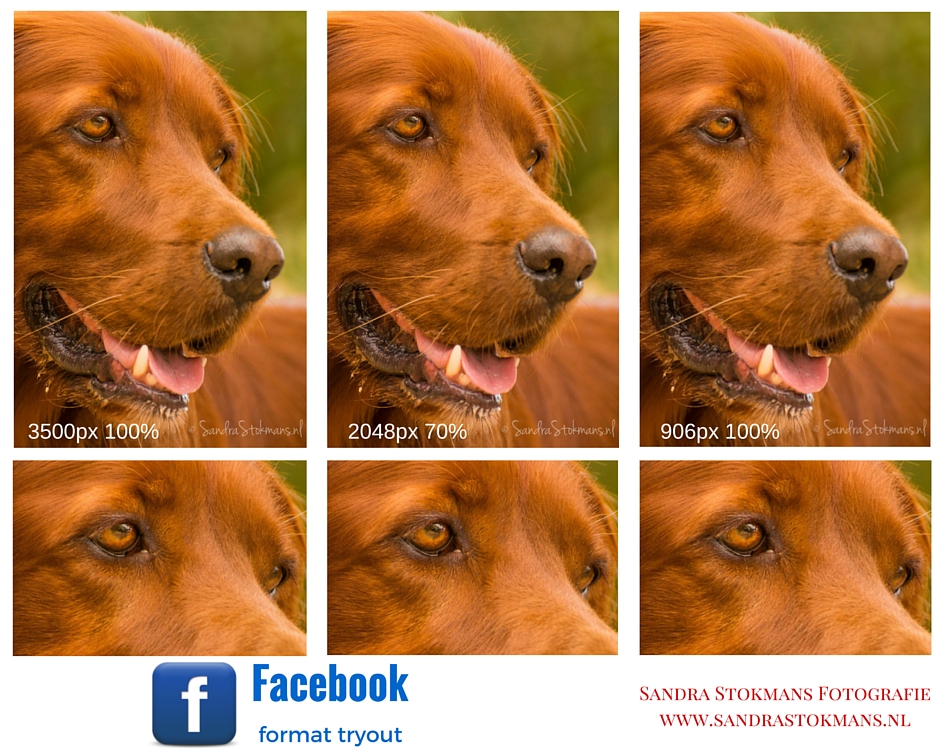
Dus nu de proef op de som. Ik heb twee foto’s genomen waarbij ik drie formaten uit Lightroom geëxporteerd heb (kan je in elk programma doen die foto’s in aangepaste bestandsformaten kan exporteren): 3500px, 2048px op 70% kwaliteit en 906px. Alledrie heb ik iets verscherpt binnen Lightroom door bij het Exporteren > Uitvoer verscherpen > Scherm op Standaard te zetten. Deze foto’s heb ik vervolgens op Facebook gezet, en zie hieronder de uitkomsten. Je kunt best duidelijk een scherpte verschil zien bij de lippen (906px is het scherpst). Als je dan op je mobiel de foto’s vergroot blijft 2048px het scherpst. Dit zal een gemiddelde bezoeker niet opvallen.
NB: ik heb ook onderstaande foto vanuit Lightroom geëxporteerd met 2048KB, max bestandsgrootte 100KB en verscherpt voor scherm op Standaard (lippen waren iets minder scherp dan die van 2048px 70%). Deze werd qua bestandsgrootte 89KB en met het downloaden vanaf Facebook was het bestand 112KB. Wat Facebook dan precies doet is mij een raadsel.
PS: Ik vroeg onlangs aan de bekende Nederlandse fotograaf William Rutten hoe hij dat deed. Ik had een paar keer een foto op Facebook langs zien komen van hem. Als je het op je mobiel vergrootte was het beeld zo scherp. Nou zal dat gedeeltelijk aan zijn camera liggen, maar ik was benieuwd in welk formaat hij zijn foto’s op Facebook zette. Hij berichtte mij terug dat hij screenshots maakte van zijn foto’s. Dat zal ik nog eens gaan proberen 🙂 en dan zal ik jullie de resultaten vertellen.

Dus wil je een foto op Facebook zetten, jouw foto’s, met de best mogelijke kwaliteit, zou mijn advies zijn: gebruik het formaat 2048px.
Ik heb ook paar keer het advies gelezen om een PNG te gebruiken omdat die (nu nog) niet wordt gecomprimeerd door Facebook. Met Photoshop kun je een RAW bestand exporteren naar PNG, maar met Lightroom niet. Ik heb een plug-in gevonden die dat wel doet, met uitleg hoe je de plugin kunt installeren op een andere pagina. Dus ik heb bovenstaand bestand ook als 2048px PNG geupload naar Facebook en wat schetst mijn verbazing Facebook maakt er een JPG van en het 3,5MB bestand wordt geresized naar 293KB. Ik zie geen groot verschil met de verkleinde foto’s door Facebook van hetzelfde formaat. Ik denk dat ik zelfs zou zeggen dat de verkleinde foto van 2048px gecomprimeerd in Lightroom tot 70%, licht scherper is dan de door Facebook verkleinde PNG/JPG. Ik heb een album, Facebook tryout formaat foto, op mijn Facebook pagina gemaakt mocht je interesse hebben. En let dan op de lippen, ik vind dat je daar het (kleine) verschil in scherpte het beste ziet.
Heb jij ervaring met foto’s uploaden naar andere sociale media en de gevolgen daarvan, en wat dan het beste zou zijn, dan zou ik het super vinden om dat te horen (zodat ik het ook kan uitproberen) 🙂
ENGLISH
You know what the best photo format is on Facebook without real visible quality loss?
For both entrepreneurs whom use images to get a message across or to sell a product, and for lovers of photography, it is important that your photos, your visual designs are as good as possible when displayed in the diverse social media. How irritating is it to upload photos on Facebook and then discover that it just is not as sharp as you had in mind, or at least as it appears on your screen. By adjusting the image yourself you will save the quality of the image.
Because Facebook automatically resizes your photos (somewhat extreme compression) when you add them to Facebook, Facebook recommends for the highest possible quality they recommends the following:
1. Resize your photo to one of the following supported sizes:
- post photos: 720px, 960px, 2048px (width)
If you use a photo of 2048px, mark the check box High quality when uploaden to FB. If you are uploading to a Facebook Album this is fine, because there is a check box for “High Quality”. This helps prevent over-compression. However, uploading images directly on your timeline of cover it does not have the high quality check box. Online you will find that it is also recommended you to set the quality at 70% in Photoshop or Lightroom bv (in Lightroom when Exporting the image I put the Sharpen Output for Screen to Default).
- Cover photos: 851px by 315px
To avoid the cover photo being compressed, make sure the file size stays below 100 KB. By reducing the file size yourself, Facebook does not have to do it and the quality of the image will be much less affected.
2. Save your image as a JPEG file with an sRGB color profile.
“The proof of the pudding is in the eating”, is it not?! So I took two pictures that I exported in three formats from Lightroom (you can do these in each suitable program which exports photos): 3500px, 2048px with 70% quality and 906px. I sharpened all three in Lightroom when Exporting the files with Export Sharpen > Screen Default. I then uploaded these pictures on Facebook, and see the results above and below. With the picture of the boy you can clearly see a difference when looking at his lips (906px is the sharpest). With the dog it is a little harder to see but around his eyes you can see the difference. When you enlarge a picture on your mobile phone’s photos remain sharper with 2048px. And an average visitor will nog really notice the difference.
Note: I have also exported the photo above from Lightroom with 2048KB, max file size 100KB and sharpen for screen on default (lips were slightly less sharp than 2048px 70%). The file was uploaden at 89KB and when I downloaded it from Facebook the file size was 112KB. What Facebook does exactly is beyond me.
PS: I recently asked the famous Dutch photographer William Rutten how he did it. I saw a couple of his pictures on Facebook. When I increased his pictures on my cellphone his images stayed so sharp. Well it might partially be his camera, but I was wondering in what format he posts his photos on Facebook. He wrote me back telling me he made screenshots of his photos. I think I will try that sometime and let you know the results :).

My advice would be to use the 2048px format, that’s what I’ll be doing as of now.
Online you come across advice to use a PNG because that (still) is not compressed by Facebook. With Photoshop, you can export a RAW file to PNG, but not with Lightroom. I found a plug-in that does, explaining how to install the plugin on another page. So I uploaded above file as a 2048px PNG to Facebook and imagine my surprise Facebook makes it a JPG and the 3.5MB file is resized to 293KB. I do not see a big difference with the resized photos of the same size. I think its safe to say that the resized photo of 2048 compressed in Lightroom to 70% is a touch sharper dan the by Facebook resized PNG/JPG. I have an album, Facebook tryout formaat foto, on my Facebook page if you’re interested. And please note the lips, I think you can see the (small) difference in sharpness best.


